123.hp.com/oj5255
HP Officejet 5255 Printer Setup

123 Hp officejet 5255 setup
The 123 HP OfficeJet 5255 printer is armed with high quality printing, facsimiles and scanning options for an attractive price. The drivers of 123.hp.com/setup 5255 or 123.hp.com/oj5255 can be downloaded.
Other Officejet features include
- 4-color inkjet printer (CMYK).
- Improved (1200x1200dpi) print resolution
- 1200dpi scanner resolution.
- 200dpi fax resolution.
- Wireless connectivity, USB 2.0, Apple AirPrint.
- 60-blade input tray, 25-blade output tray.
- Size 222x454x362 mm.
- 5.76 kg weight.
123.hp.com/oj5255 123 HP Unboxing OfficeJet 5255
This section describes the contents of the box that your printer has been sent to and tells you where to find and remove possible packaging.
- Fold the box’s flaps back and remove power cord, CD and other items from the top.
- Lay the box to the bottom of the printer. Drag the printer out of the box gently using the transparent cover and remove the Styrofoam caps on both sides of the printer.
- Remove all tape from the outside of the printer. Blue tapes have been designed to easily be released on any printer surface without leaving any residue.
- Open the door to the ink access area, remove the material from the inside of the 123.hp.com/oj5255 printer, and close the entrance door and the outside door.
123 HP OfficeJet 5255 Basic startup
To initialize the basic process, switch the 123 hp officejet 5255 printer on. To switch the printer on, follow the steps shown below:
- Connect the power supply on one side of the printer cord to the back and on the other side to the wall outlet.
- Power strips should not be used frequently so as to avoid power problems for the printer.
- Now, press the power button to switch on the printer.
- The printer initializes and noises during the process. Wait until it’s totally silent.
- The printer control panel shows a menu, which requires you to select a language. Choose your language by scrolling the list and tap yes to Confirm. Set the location of your printer after the same process.
- Select and set your printer date. Tap Next
- Set the printer time and then click Fulfill. Then you can install the ink cartridges and load the paper.
123 HP Officejet 5255 Loading of unused paper
- Raise the input tray at the back of the 123.hp.com/oj5255 printer to the left.
- Align a pile of unused sheets and slide them onto a hard surface through the input tray.
- Slide the paper width guide to touch the edge of the paper stack.
- Slide out the output tray and raise the tray extension.
- Touch OK when the process is finished. The printer automatically prints a configuration page.
- The confirmation page must be scanned to complete alignment of the printer once the printing is complete.
- Place the confirmation page on the bottom of the scanner glass and tap OK to complete the alignment process. You can then proceed to download the 123.hp.com/setup 5255 software.
HP OfficeJet 5255 Ink Cartridges Installation
The first way to install the ink cartridges is to open the outside door and the access door to the ink cartridge. Wait for the door to move to the center. Wait until the printer is silent and continue to install the cartridge.
- Remove the three color cartridge from the wrapper by the orange pull tab and remove the plastic coating.
- Don’t touch the electric nozzles or copper-colored contacts because they could lead to bad electrical connection or blockage.
- Push the tri-color cartridge to the left slot at a slight angle. Make sure that it fits snugly.
- Repeat the same procedure for black cartridge installation.
Once the installation process is finished, close the door to the ink area and load stacks of plain unused paper. Follow the steps below in the next section to find out how unused documents can be loaded.
Wireless Installation Wizard 123 HP OfficeJet 5255 printer
Wireless Installation Wizard Sets your printer up in the wireless network environment. Before starting a Wireless Installation Wizard
- Network Name (SSID)
- WPA Passphrase
Once you have collected the above information check that both the 123.hp.com/oj5255 printer and computer is enabled and are connected to the same network.
- If your printer has any USB cable connected, plug it off your printer.
- If you have already set your printer up using a wired USB connection, follow the steps below for changing your Wired to Wireless connection settings, i.e. in the HP folder listed in the programs installed, double-click the folder of your printer, and click the printer’s name.
Go to the utility menu and click on Installation of Printer Setup & Software.
Click Convert USB Printer Connected to Wireless or connect to a new printer and follow the on-screen instructions for completing the Setup process.
If you change your network connection from Wired to Wireless, you can skip reading the remainder of the guide as the on-screen instructions include a wireless installation assistant, as are the downloading and installation of 123.hp.com/setup 5255 software drivers.
- Touch the Wireless Setup Icon on the printer control panel.
The wireless screen is shown.
- Tap the Wireless Setup Wizard and then the Settings icon. Follow the instructions on the panel to connect to the wireless network of your printer.
- You can continue to download and install 123.hp.com/setup 5255 software drivers. 123-HP-Setup-oj-5255 123 HP OfficeJet 5255 Wireless Protected Setup WPS assists two devices to establish wireless connectivity.
- This setup can be carried out only if 123 hp com setup 5255 or 123.hp.com/oj5255 have already downloaded and installed the software drivers.
- The push button procedure and pin method are relatively easier to make Wireless Setup possible and to connect devices.
Before you can start, make sure your router supports wireless protected configuration. Click on the Wireless Protected Setup to read more.
123 HP Officejet 5255 driver and Installation setup
Go to 123.hp.com/setup 5255 to install the required print driver and click the button Download. After the download is over, click on the program in the Downloads tab to open or choose Run and wait until the installer extracts the necessary 123.hp.com/setup 5255 files.
- Open and connect your printer to the network for the purpose of activating and registering HP Easy Start Utility software. Downloads and installs the latest drivers and software from 123.hp.com/setup 5255. To continue, click Continue.
- Carefully read HP’s terms and conditions and check the terms and conditions declaration next to Agreement. Click Continue to move to the next page. The printer is then detected by the HP Easy Start Utility. If the printer is not detected, just click on your printer’s name.
- HP Auto Wireless Connection should be activated in order to connect the printer to the same WiFi network as your computer and to apply wireless configuration on your printer from your computer.
- Again, follow the Terms and Conditions and click on the checkbox next to agree to them. Go to the installation now by clicking Continue.
- The installer connects to the printer and uses computer to the printer for wireless settings. For the terms and conditions, click on the checkbox and click Continue.
- Appears now the Instant Ink activation page. Click “Yes, Enable” to accept the free trial for three months. Click’ No Thanks’ otherwise.
- At this point, the printer can be activated and registered by entering relevant information.
- Please specify how you want to use the printer and the printer location. To continue, click Continue.
- HP will automatically check the latest drivers and printer software after this step. Users can install the full software drivers or just the basic printer drivers. The basic version includes only basic printing and scanning functions. The complete 123.hp.com/setup 5255 feature software includes other functions such as I.R.I.S OCR which can be used to convert scanned handwritten papers into text files without the need to type it all in again.
- Once you have selected the required option, click Continue to download 123.hp.com/setup 5255 software and drivers.
- The program automatically extracts the required files from 123.hp.com/oj5255 and opens immediately after a download is complete. Once the program starts, you can also adapt your selection of software.
- Read all the terms and conditions of HP and click the Next to the terms and conditions of the installation by clicking on the checkbox.
- The Installer downloads 123.hp.com/setup 5255 software and drivers after which the printer connected to the WLan is detected and installed.
- Select the printer usage mode and enter the printer location again. Click Next to finish your computer software setup.
- When the software installation process is complete, a Web Services information sheet is printed automatically.
- HP will ask if the Instant Ink service should be activated again if previously it was not. Similarly, if it wasn’t before, HP will ask you to activate and register the printer again.
This completes the HP Officejet 5255 wireless setup from 123.hp.com/oj5255.
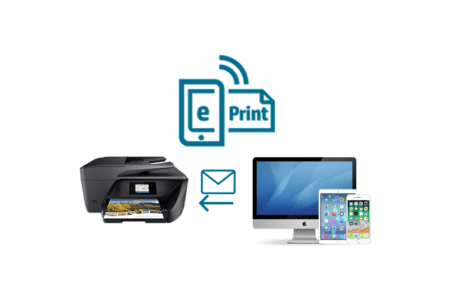
123 HP OfficeJet 5255 ePrint Setup
HP's ePrint service significantly reduces the distance between you and your printer by permitting you to print from anywhere in the world, provided an active Internet connection exists. You only have to send an e-mail to the e-mail address of the printer. The best part of it is that ePrint Printer does not require software or drivers to be installed to use your document and you can handle all your ePrint jobs and queues easily and efficiently via your HP Connected account. Click to learn more about ePrint configuration on your 123 HP OfficeJet 5255.
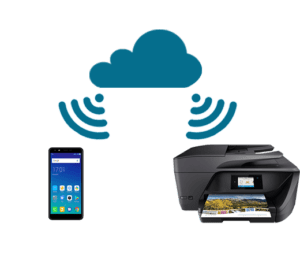
123 HP OfficeJet 5255 Google Cloud Print
Print documents and Photos of any device connected to your printer using Google Cloud Print over a wired or wireless network. Google's Servers delete your documents after printing is done so that it is a secure gateway for printing documents. This service does not require additional HP or Google software or drivers to be used.